

How To Update Arched Windows
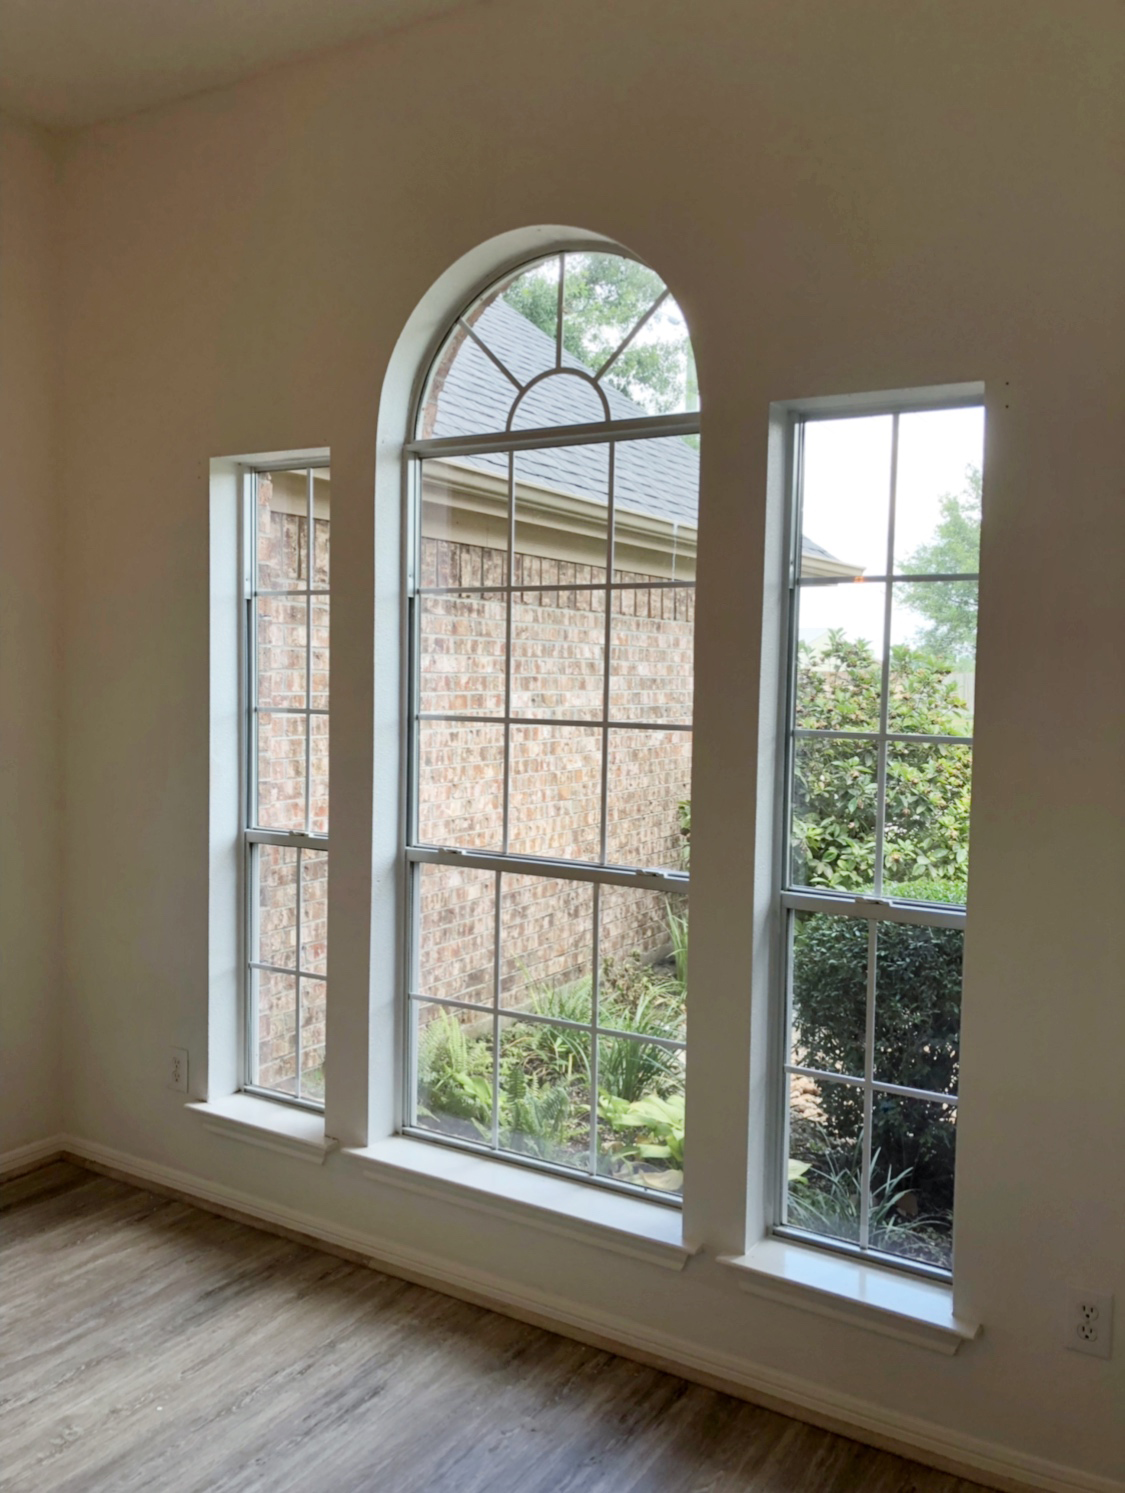
You guys! Today's project is easily one of our favorite before and afterward'due south to appointment! We recently drove to our sister'due south house in Houston to crash information technology and give it a trivial shanty makeover. We have already shared so many of the other projects with you, and today nosotros are showing you how nosotros gave her dining room window a serious update! Many of you may accept one-half circle windows. They can non simply be difficult to keep sun and heat out of, but they also tend to lock the room they are in into a certain expect and era. Nosotros decided to take care of that with a little trim… Well, actually it was a whole lot of trim!Just click the Play Push button below to spotter!
Earlier you all ask, from the outside of the firm, the window now looks white. You can definitely add something to the back of these boards before attaching if you desire a different look, but we love the simplicity of the white!
At present, each window in every home is going to exist unlike. We will show you how nosotros achieved the look with her window setup, but you will probable have to modify it a bit to piece of work with yours. The very first thing we did was remove the existing window stool and replace it with new boards that were flush with the border of the wall. We used our table saws to get them the exact width we needed. We are using primed white pine boards for the whole thing.

We attached the new stool pieces using wood glue and 2″ nails with our Ryobi 16G Finish Nailer.

Adjacent, we created the "L" piece, or apron that runs under the window. This is a one×4 piece with a 1×two piece that we attached to ane end. To get the measurement of the i×4 slice, we measured the very end and inside of each side window to get the overall width of the whole window. So we added seven″ to that number since we are going to be adding a i×4 going vertically on each end in a afterward step. And then, measure this number and and so add 7″.

The 1×2 piece will exist 1.5″ longer on each end and stick off evenly. We attached those together using forest glue and ane.25″ brad nails with our Ryobi 18G brad nailer. One time those were attached together, we placed in flush with the new stool slice and fastened it to the wall using the finish nailer with ii″ nails over again. The apron will sit evenly under the window.

Next, we moved upwardly top! This is a pace that some of you may not need depending on your setup. Our half circumvolve window was joined to our lower windows, so nosotros needed to create a head jamb for the top of the window to separate the ii. We first measured this spot…

So, nosotros cut a board to fit that space…

To attach it, we added three/4″ pocket holes using our Kreg Jig to the top of this board where nobody will ever see the holes. And then, we attached information technology to the wall on each side using 1.25″ pocket hole screws.

We worked our way up from that signal. We used a 1×10 board and a 1×2 lath to create the beginning slice for the header of this window trim. We cut the 1×10 the aforementioned length as the 1×4 we used to create the frock, and we once again made the i×2 board ane.5″ longer on each side. We fastened the 1×2 to the 1×10 using woods glue and brad nails, and then set the bottom of it flush with the inside top of the windows and attached it to the wall using 2″ Spaz screws into the wall studs.


Nosotros congenital the balance of the header adjacent. This is a 1×8 board, cutting the same length as the apron with a 1×2 board fastened to each end. The 1×two boards are the same measurement as the previous 1×2 boards.

Nosotros attached them using woods glue and brad nails, so fastened the entire slice to the wall using 2″ Spax screws.

From there, we moved on to our vertical trim pieces. The exterior two boards are 1×4. We grabbed this measurement and cutting them to size.

We attached them using 2″ finish nails.

For the inside trim pieces, we grabbed this measurement. Nosotros then used a table saw to cutting 1×6 boards downwardly to the exact width we needed. The were the same length equally the 2 outside trim pieces, and we also attached these using 2″ nails.

That's it for trim! Now comes the most important office…. The caulk and woods filler! My stepdad once told me… Caulk and Paint brand a carpenter what he own't. I beloved it! It'due south so true! And it really comes into play when working with walls that aren't totally square and flush. Nosotros filled all of seams with caulk, and filled the nail holes with wood filler. Subsequently that dried, we put our sis to work painting it to match the rest of the room! Now, let's await at that before and after once again! Hide your eyes… Here is the first before!

Here it is right before nosotros got our hands on it!
And hither she is now… Heck yes!

What about that guys?!
And a shot of the whole room….

Here are links to all the goodies we used!
Finish for tabletop click Hither
Paint for base of table click Hither
Rug under table click HERE
Window panels click Hither
Dining Chairs click Hither
Table Runner click Hither
Centerpiece Vase Click HERE


How To Update Arched Windows,
Source: https://www.shanty-2-chic.com/2018/08/adding-trim-to-a-window-and-hiding-a-half-circle.html
Posted by: hardyhaddle.blogspot.com
0 Response to "How To Update Arched Windows"
Post a Comment